Mastering the Art of Smoking a Whole Packer Brisket: A Step-by-Step Journey
There’s something magical about the combination of beef, smoke, and patience. For barbecue enthusiasts, smoking a whole packer brisket—a cut that includes both the lean “flat” and the marbled “point”—is the ultimate challenge. Follow along as we break down the process of smoking this iconic cut, from trimming to slicing, with lessons learned and tips for success.
Why a Whole Packer Brisket?
A whole packer brisket is prized for its balance of textures and flavors. The flat offers tender, lean slices, while the point delivers rich, fatty burnt ends. Unlike pre-trimmed cuts, the whole packer retains natural fat layers that protect the meat during the long cook, ensuring juiciness.
Trimming: Shaping the Brisket
1. Start Cold: Trim the brisket straight from the fridge for easier handling.
2. Remove Hard Fat: Trim thick, hard fat (deckle fat) between the point and flat, leaving a ¼-inch layer of soft fat on top.
3. Round the Edges: Smooth sharp edges to prevent burning and create an even shape.
4. Avoid Over-Trimming: A small “bald spot” in the fat won’t ruin the cook, but aim for consistent coverage to protect the meat.
Pro Tip: Save trimmings for burgers or tallow!
Seasoning: Less is More
Binder: Lightly coat the brisket with oil to help the seasoning adhere.
Rub: Use a 50/50 mix of coarse kosher salt and 16-mesh black pepper for a balanced bark. Apply generously, ensuring even coverage.
The Smoking Process
Equipment: A Slow ’N Sear grill (or similar) with lump charcoal and applewood chunks.
1. Fire Setup:
Arrange charcoal and wood chunks in the grill’s designated smoking area.
Add hot water to the reservoir for moisture and temperature stability.
2. Temperature Control:
Start low (245–250°F) to gently render fat without drying edges.
Gradually increase heat to 260–280°F during the stall (when internal temps plateau).
3. Smoke Management:
Maintain “clean smoke” (thin, blue smoke) for optimal flavor.
Spritz edges with apple cider vinegar every 2 hours to prevent drying.
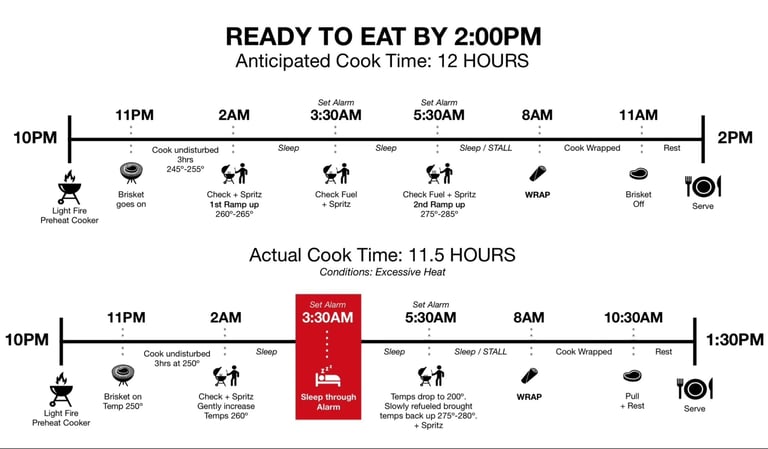
4. Timing:
Plan for a 12-hour cook, but stay flexible. Heatwaves or humidity can speed up the process!
Wrapping: The Texas Crutch
When: Wrap in butcher paper (or foil) once the bark is set and the meat feels firm (around 165–170°F internal).
Why: Wrapping traps steam, speeds through the stall, and preserves tenderness.
The Rest: Patience Pays Off
Let the brisket rest for 1–2 hours post-cook. This allows juices to redistribute and collagen to fully render.
Pro Tip: Resting in a cooler (or at room temperature in a pinch) ensures a succulent result.
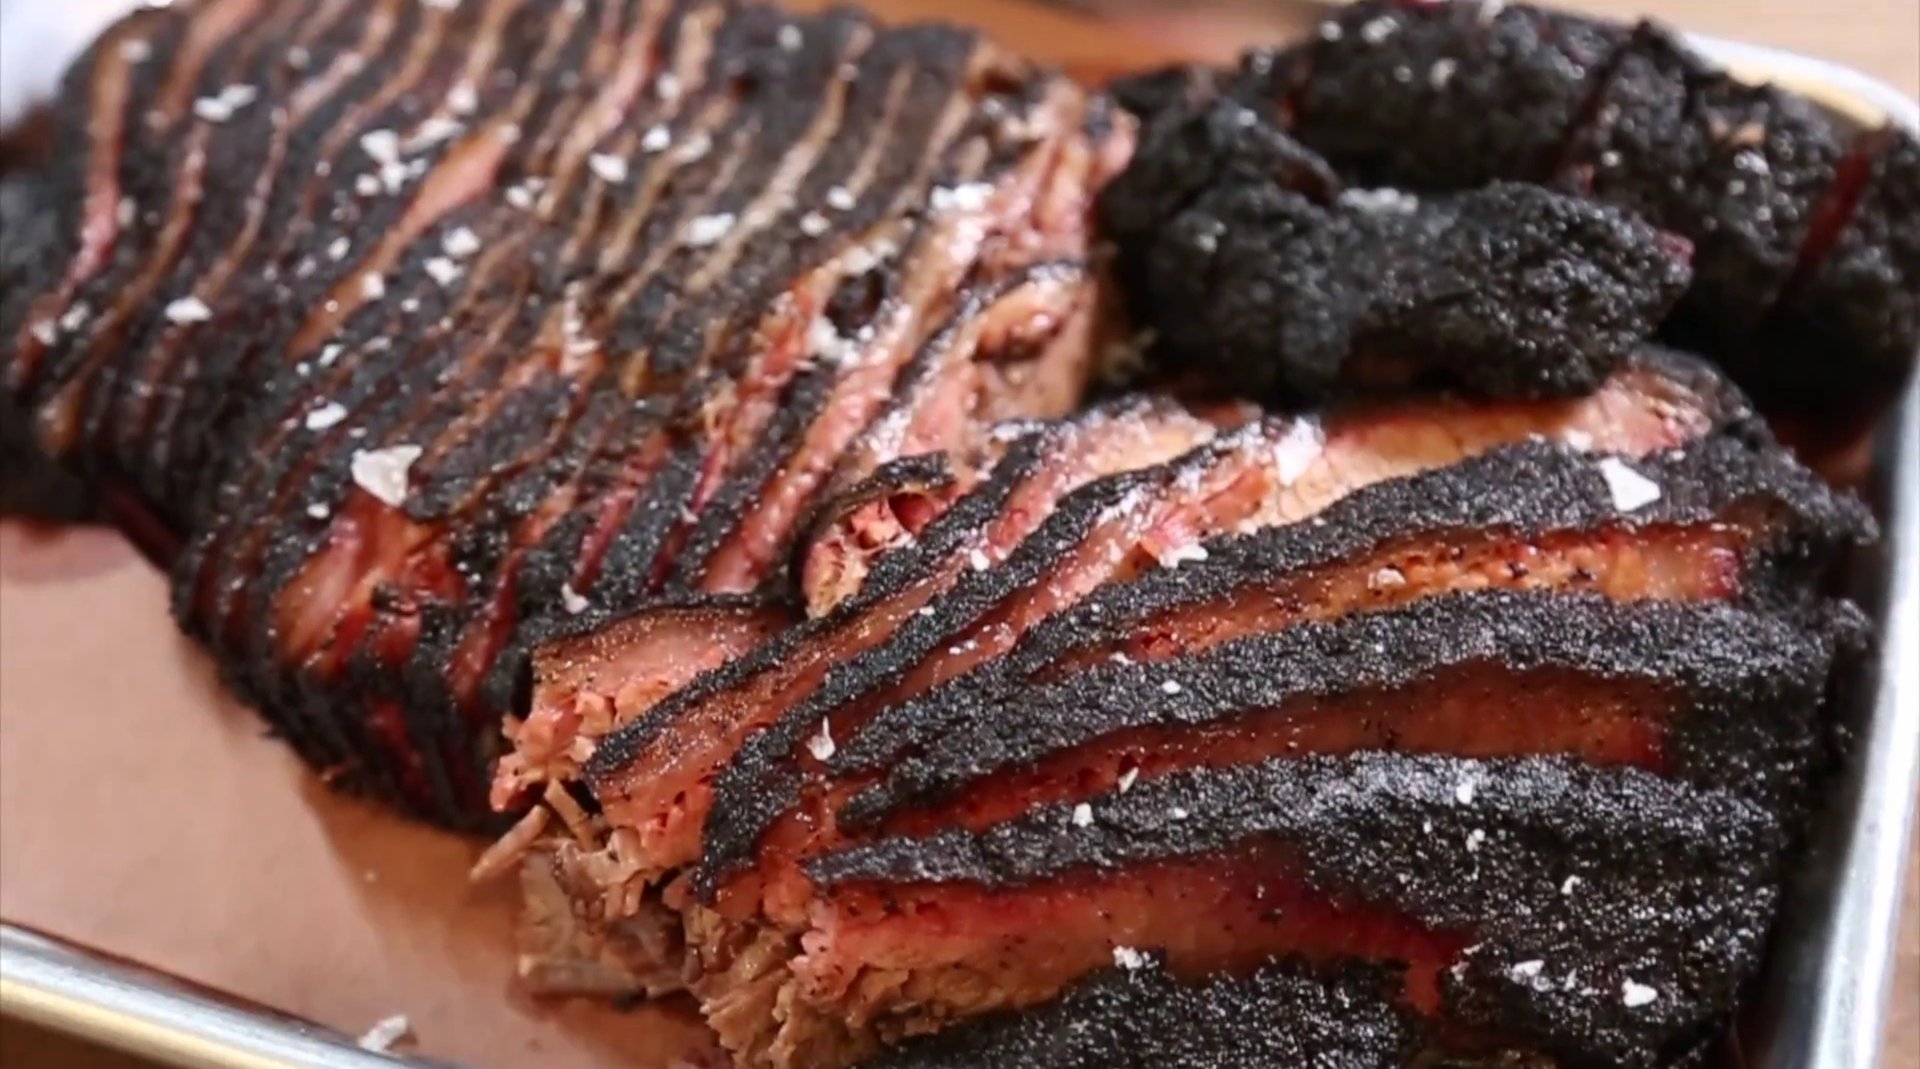
Slicing: Follow the Grain
1. Separate the Flat and Point:
Slice the flat against the grain (look for parallel muscle fibers) into pencil-thick slices.
Cube the point for burnt ends or slice diagonally for fatty, bark-heavy bites.
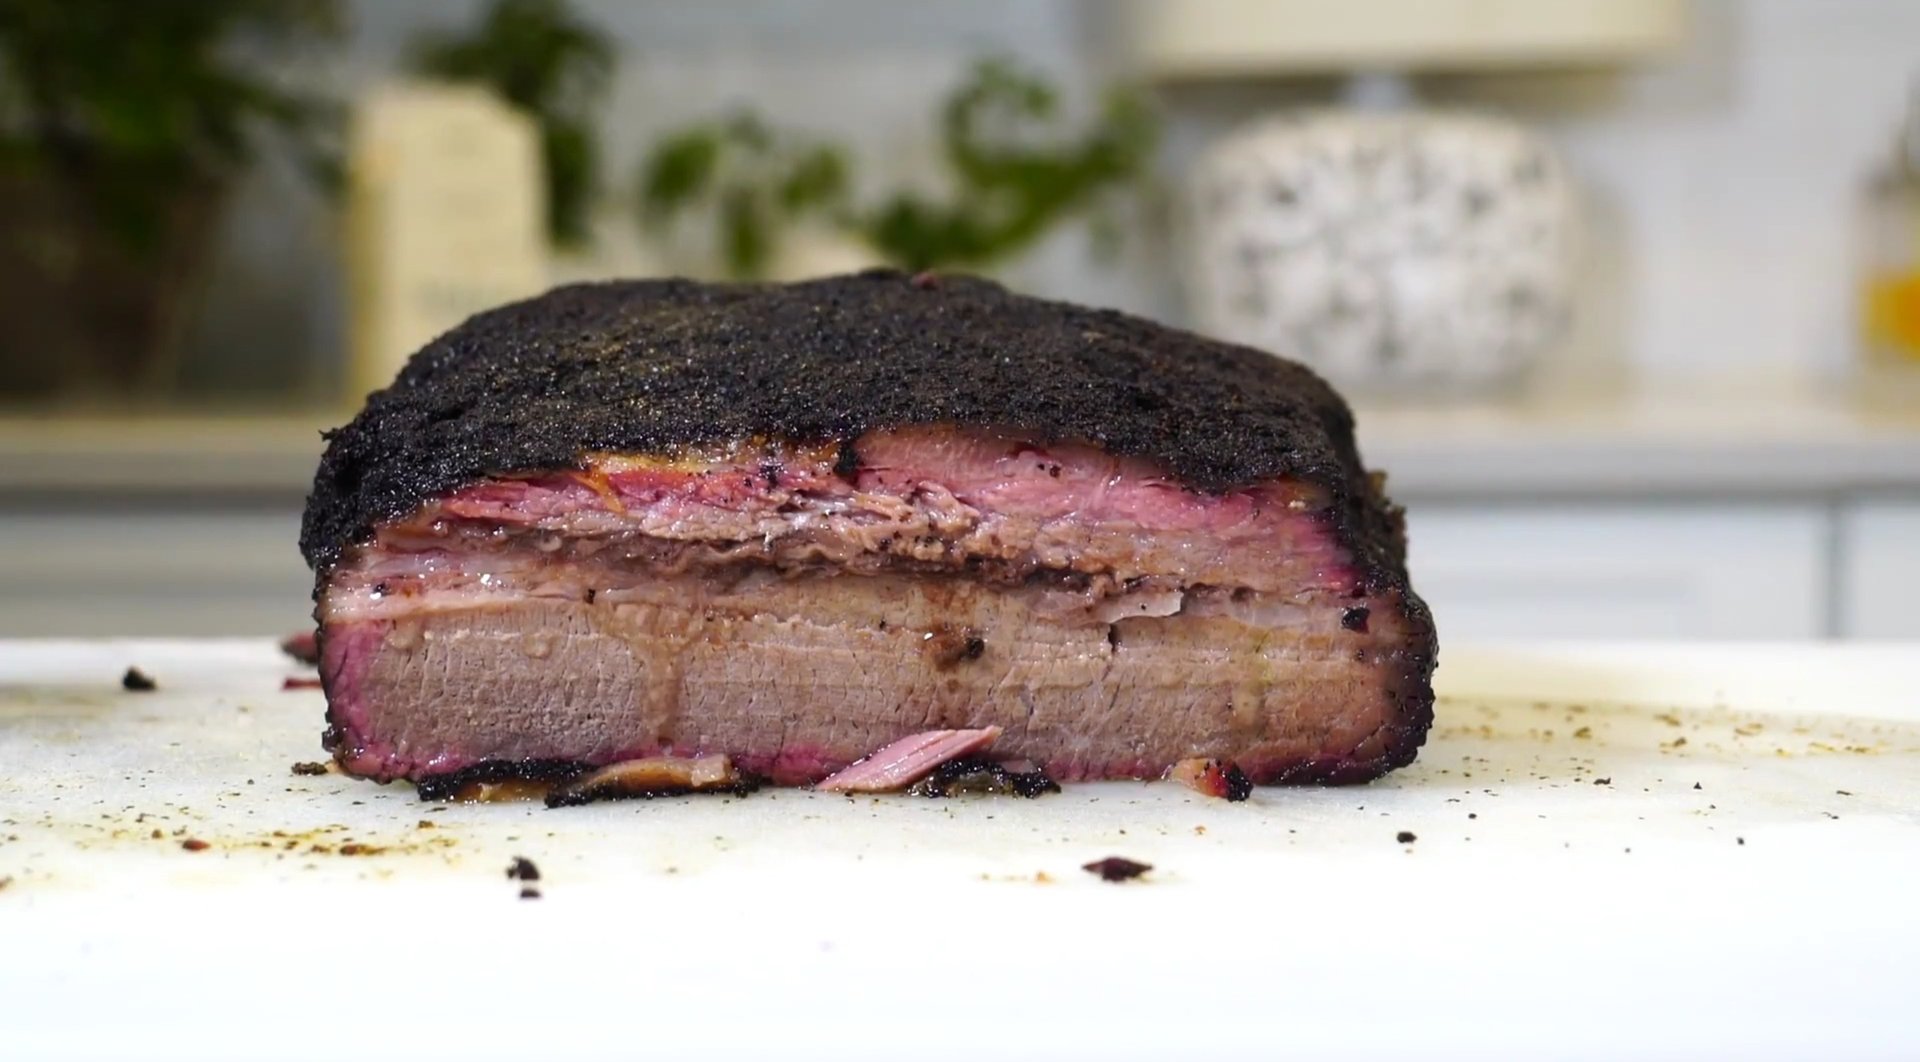
2. Look For:
A rosy smoke ring (sign of good smoke penetration).
Rendered fat that glistens but isn’t chewy.
Lessons Learned
Trim Carefully: Over-trimming risks dryness. Aim for fat consistency, not perfection.
Monitor Temps: External heat can accelerate cooking—adjust your timeline accordingly.
Rest Longer: Even a rushed rest improves texture. Don’t skip it!
Final Thoughts
Smoking a whole packer brisket is equal parts science and art. While this cook delivered juicy, flavorful results (despite a few hiccups), the real joy lies in the process. Whether you’re a novice or a seasoned pitmaster, each brisket teaches something new. So fire up the grill, embrace the trial and error, and let the aroma of smoked beef bring everyone to the table.
Inspired by the partnership with Beef. It’s What’s For Dinner. on behalf of the Beef Checkoff.
Hungry for more? Share your brisket adventures or tag us in your smoky masterpieces.
Remember: Great barbecue isn’t about perfection—it’s about passion, patience, and the pursuit of flavor. 🔥🍖